
On your PVS02, launch the Provisioning services installer and install all the pre-requisites. The procedure is almost identical as installing a standalone PVS server.


Click okay and then the configuration will begin. This message appears because we have not installed the Console yet.

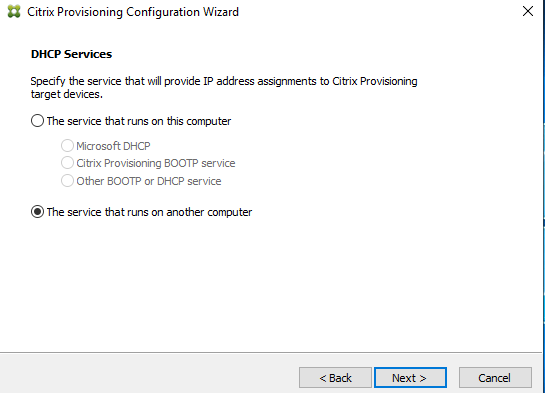
My DHCP server runs on my DC, select The service that runs on another computer here.
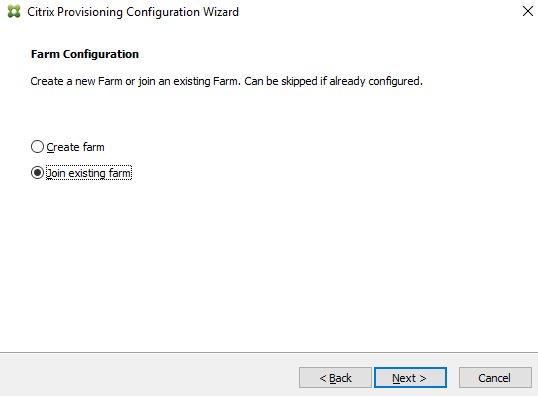
Here, we will select Join existing Farm to join this PVS02 to the existing farm.

Enter the SQL server name and click next.
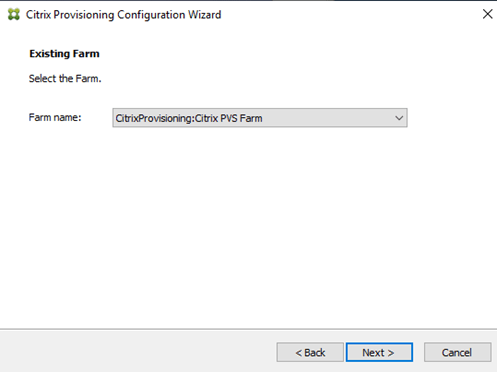
Select the Farm name and click next.

Here, we can create a new site to the same farm. We are configuring HA option for our PVS farm, so I will have this PVS02 joining the Existing site.

And joining to the existing store.


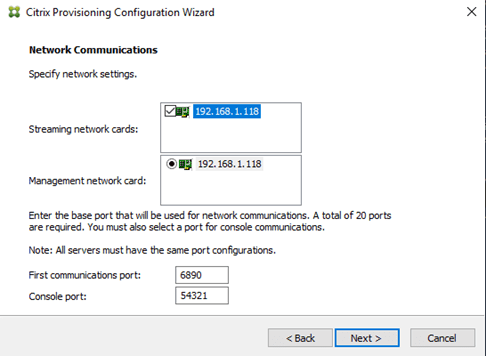
Make sure to have the same ports define here as we have for PVS01. It should be the same because we are using the default ports.


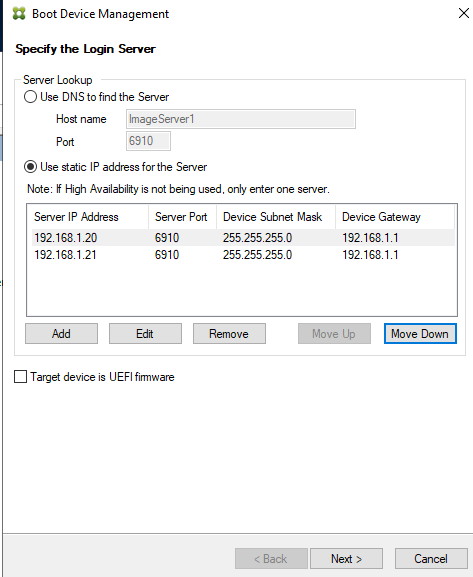
Add the IP of PVS02 here. PVS01 should already be here.


I will also install Citrix PVS console on PVS02. It is just a series of clicking next, and I will just skip that part here.
To take advantage of having 2 PVS server in the farm, we should configure the Bootstrap to include both servers, so that in case if one of the PVS server went down, the VMs will know where to look for that bin file. To do that, go to Site -> Servers.

This will now show us all the PVS servers that are part of the farm.
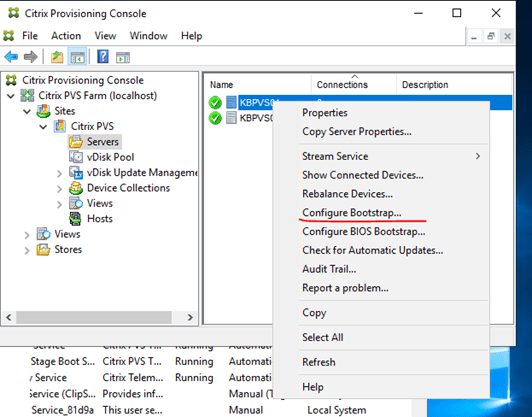
Right click on PVS01 and select Configure Bootstrap.
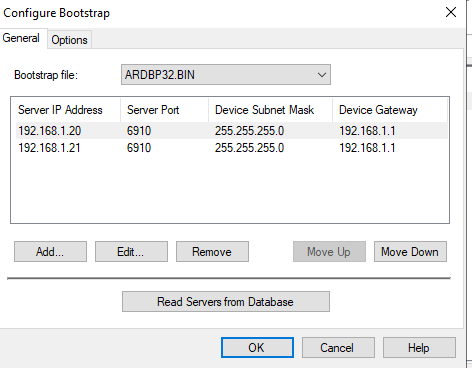
Add both PVS servers here. We will need to do the same on PVS02 and put in both servers there as well.
This goes the same for BDM, if we are using the BDM method, we will need to include PVS02 before we burn that ISO.
Now that we have configure HA for bootstrap, we will also need to configure HA for the vDisk(s). We can either create a network shared and point both PVS server to that location for storing vDisks or use a Robocopy / xcopy script to copy the vDisk files to PVS02. We can also setup a DFS-R between PVS01 and PVS02.
Using an additional network shared to host the vDisks will create an additional point of failure for your environment, unless you configure HA for that shared as well. Since there is only going to be changes every time we make updates on the vDisk, we can just put this as part of a checklist for managing vDisk updates.

Once we have a copy of the vDisk on both PVS servers, we will need to configure load balancing on the vDisk. If you have multiple vDisks in the collection, you will need to do this on all of them. Right click on your vDisk and select Load Balancing.
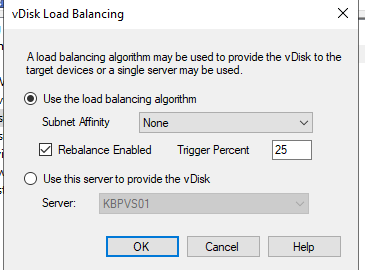
Select rebalanced enabled and define the percentage to trigger the rebalance. For the subnet affinity, since I am only provisioning to a single subnet, this option does not really matter much in my environment. Here is what each option mean, taken from Citrix product documentation.
Subnet Affinity – When assigning the server and NIC combination to use to provide this vDisk to target devices, select from the following subnet settings:
- None – ignore subnets. Uses the least busy server. This setting is the default.
- Best Effort – use the least busy server/NIC combination from within the same subnet. If no server/NIC combination is available within the subnet, select the least busy server from outside the subnet. If more than one server is available within the selected subnet, perform load balancing between those servers.
- Fixed – use the least busy server/NIC combination from within the same subnet. Perform load balancing between servers within that subnet. If no server/NIC combination exists in the same subnet, do not boot target devices assigned to this vDisk.
