
Background story (that you can safely ignore)
I have been using the template to deploy new servers at work. Now that I am spending more time in my home lab, I realize it is quite time consuming to always build a VM from scratch. I decided to create a template so that I can easily deploy a new server in minutes.
- Create a new VM and install the OS of your choice. Note that if you use both Gen 1 and Gen 2 VM, you will need to create a template for each.
- Once you have the OS installed, run all the windows updates and install any windows features that you normally need. (For my home lab, I have Telnet Client and IIS installed)
- I only went as far as installing the OS, running windows updates, and installing necessary windows features on my template. I will leave installing applications and additional roles when I configure the server further.
- Without joining the machine a domain, open CMD as an administrator.
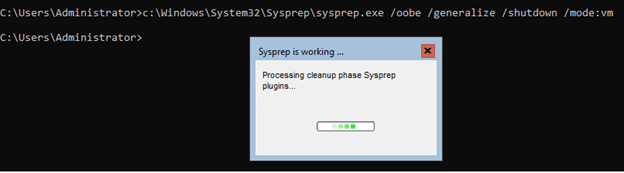
- Run this command in the CMD
C:\Windows\System32\Sysprep\sysprep.exe /oobe /Generalize /Shutdown /Mode:vm
This command will generalize any system specific data from this machine. The next time it boots, it will act as if it is a different machine. This way, you can just rename the VM and then join it to the domain, skipping the OS installation and running windows updates.
- After the machine shutdown, copy the vhdx to a network shared and rename the file to something that can tell you what template it is. I called mine “Server2019DataCenterGen1”
- With the vhdx copied to a different location, go ahead and delete/clean up the VM that you created for this template.
- The next time you need to deploy a new VM, you can just create the VM first and choose to attach a hard drive later.

- Copy the “Server2019DataCenterGen1.vhdx” to the New VM folder, rename it to the name of the new VM so that you can identify the vhdx file easily.
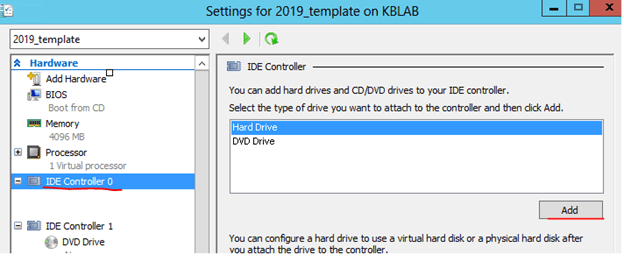
- Go back to the settings of this new VM and go to IDE Controller 0 to add a new Hard drive. Browse to the location of the vhdx that you just copied in step 9.
- Finished up the settings and start up the VM. When it boots to windows, you will have a new windows machine as if you just install the OS, ran windows updates and installed the windows features of you choice.
This is going to save you a lot of time in the long run!

One reply on “Creating a vhdx template for deploying your VMs (Hyper-V)”
[…] server in it. Using a copy of my Server2019Datacenter Gen1.vhdx template that I created from this post, I joined the machine to my domain and named it VMM02. […]
LikeLike