
In preparing the deployment of Citrix Provisioning Services, I will be provisioning a new VM and install SCVMM 2019 server in it. Using a copy of my Server2019Datacenter Gen1.vhdx template that I created from this post, I joined the machine to my domain and named it VMM02.
Requirements:
- ISO for the SCVMM 2019 installation media (need it installed on VMM02, DDC01 and PVS01)
- Windows ADK for Windows 10
- Windows E add-on for the ADK
- Microsoft Command Line Utilities 14.0 for SQL Server (I think there is another pre-requisite for this – some ODBC drive)
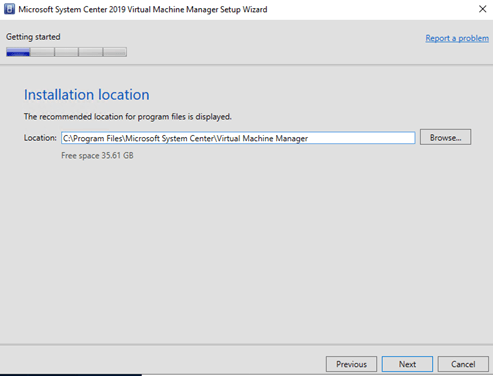
To begin, I mounted the ISO to VMM02 and extracted the installation files to a folder. The default path is in the Virtual drive that was created when you mounted the ISO, so make sure to change that to another drive.
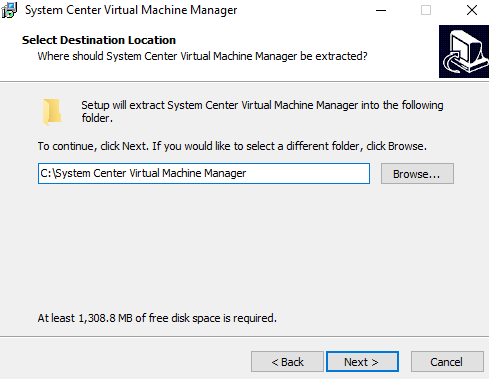
Once the extraction is done, go to the new folder that has the Setup file and start the installation process.
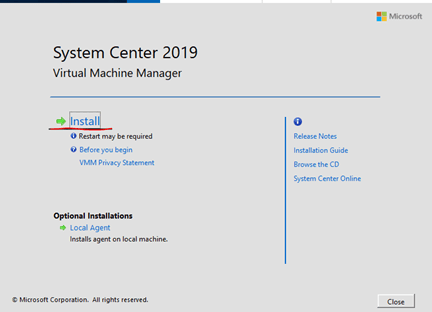
We are installing the VMM server and the console, select Install. We will need to use the same installer to install Local Agent on a few other servers in order for them to communicate properly.

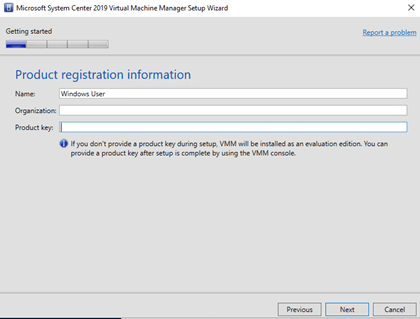
Enter a Product Key if you have one, otherwise, you can still install it and use it within the evaluation period.


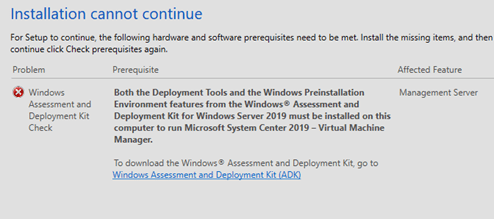
I have not installed the Windows ADK for windows 10 and the PE add-on yet. If you have already downloaded them and installed them as I listed them in the requirements, you should not see this screen. The files can be download from the URL below.
https://docs.microsoft.com/en-us/windows-hardware/get-started/adk-install

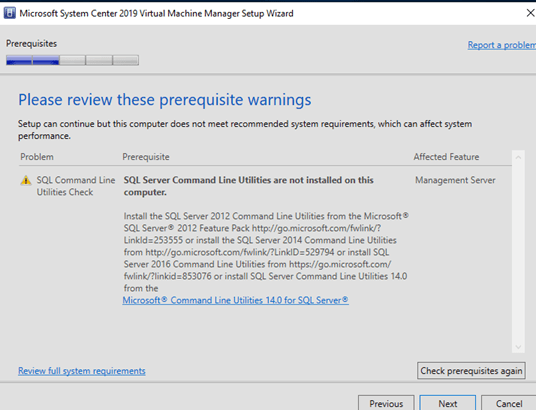
I ran the installer again after I installed my Windows ADK and PE add-on, and now I was told to install the Command Line Utilities 14.0 for SQL server.

After installing all the pre-requisite, I am finally able to get passed all the warnings and continue to the installation. Put in your SQL server name here. If you don’t have one yet, you will have to build one first. Note that the SQL Express version does not work here. I upgraded my SQL server to 2019 Developer edition.
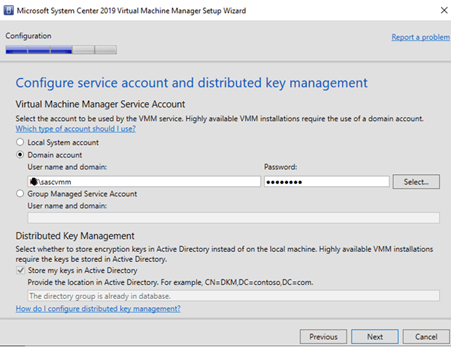
Put in a Domain Account that has Local Admin permission to VMM02. I created a service account sascvmm for this purpose.
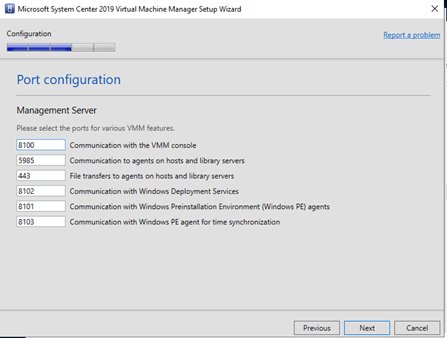
I leave the ports as default

Once the installation is completed, launch VMM console and click on connect.
My lab consists of a single Hyper V host. My DC, VMM, SQL and all other servers are a VM hosted by this host. In my first attempt of installing SCVMM, I added the Hyper-V host as a Perimeter Network device. It has a lot of restriction and I am not sure if it would work in my environment at all. I scratched my VMM01 and join my Host to the domain instead.
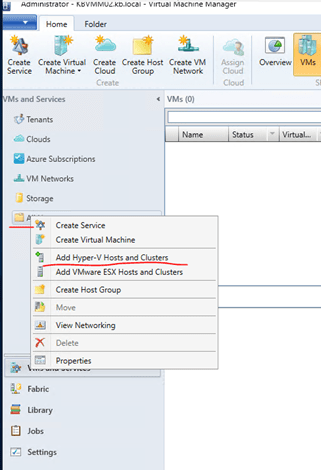
In the VMM console, go to VM and Services, right click on “All Hosts” and select “Add Hyper-V Hosts and Clusters.
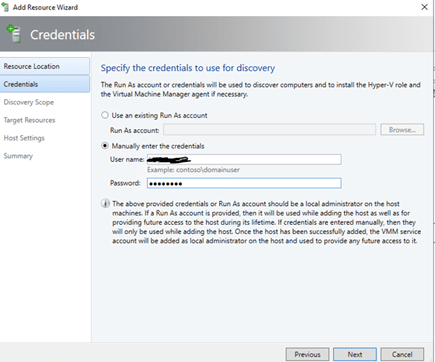
Put in the credentials of an account for machine discovery. It cannot be the same Service Account that we define earlier.

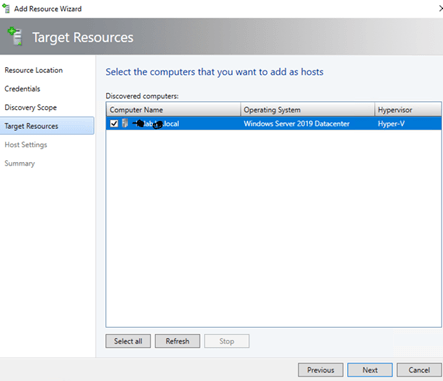
It found my Hyper-V host, click next.

My host was added as a Perimeter network device before, therefore I am re-associating this host. You can probably leave this unchecked.
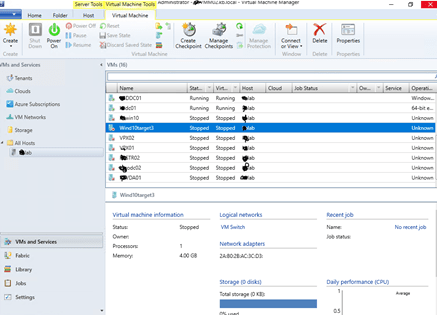
VMM console found all my VMs that are hosted on my Hyper V host. It may take some time for them to appear.
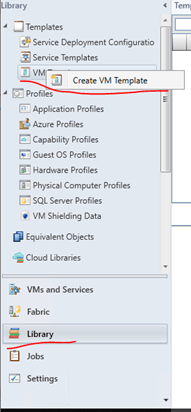
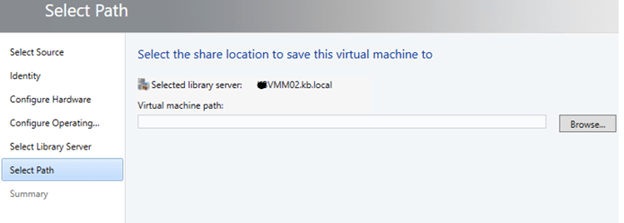
I have already created a template machine using PVS console (this will be in another post,at another time.) Go to Library, right click on VM Templates to create VM Template.
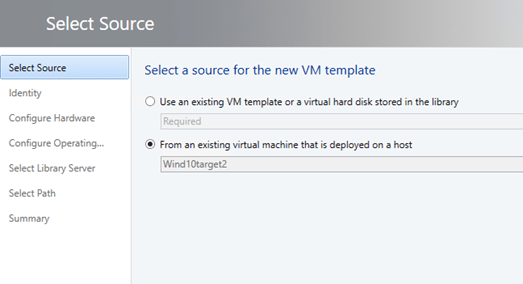
Select a VM to turn it into a template. Note that the VM will be destroyed from the Host after this step.

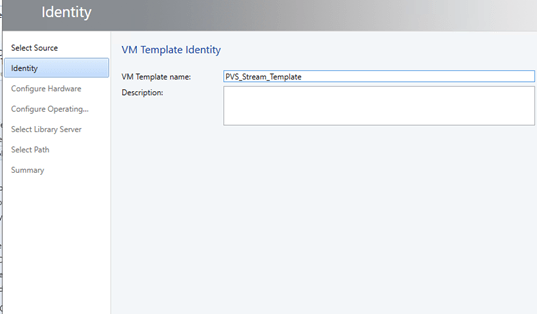
Give the template a name, I called mine PVS_Stream_Template.
Now that we have created the VM Template, we are ready to Streamed VM using Citrix PVS console!

One reply on “Citrix Provisioning Service – installing and Configuring SCVMM 2019”
[…] Compare to Citrix Virtual Desktops Setup Wizard, the Streamed VM setup wizard is quite simple. It is a standalone solution and does not need to connect to a Citrix XenApp and XenDesktop Farm. That is, as long as you have already setup your SCVMM server and installed the VMM console on PVS01. If you have not, I wrote a post about this here.) […]
LikeLike