There are a few ways for PVS to work. Like many solutions that provide a machines provisioning service, one of the ways require to have a DHCP server setup with option 66 and 67 configured. There is another way that only requires a DHCP server to distribute the IP addresses, and we can then use Citrix PVS PXE service to deliver the information needed during the PXE boot process. You can also create an ISO file to mount on the computers to provide all the information the computer needs to boot into the vdisk that we setup for that machine. In this article, we will install the DHCP server role in our Domain Controller to distribute IP addresses to those machines.
*In my lab, I needed to disable DHCP server in my router first before setting this up. Using the DHCP server from my router may work with method 2 and 3 mentioned above, but I prefer to work with a DHCP server that is not part of my home router. To learn more about how I struggle to disable the DHCP server in my router, you can check my previous post here.
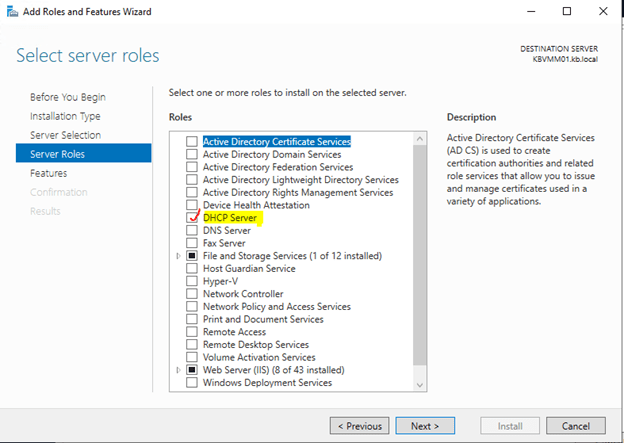
To begin, open Server Manager and select Add roles and features. Navigate to “server roles” and check the box next to DHCP server. The installation is pretty straight forward.
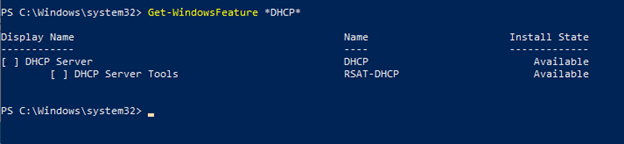
As an alternative, you can also install this role from a PowerShell console. (always run it as an administrator to prevent any permission issues.)
I am not sure what name I should enter to start the installation. This command will give me that information. (you can also just Get-WindowsFeature to look for the name from the whole list.)
Get-WindowsFeature *DHCP*
To install the role
Install-WindowsFeature -Name DHCP -IncludemanagementTool
This role does not require a restart. Once you have the DHCP server role installed, launch the DHCP console. Right click on IPv4 and select “New Scope”
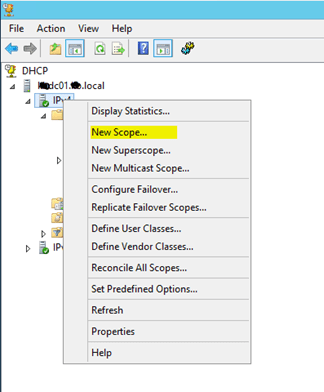
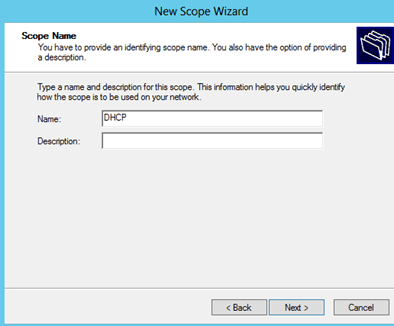
Follow the wizard to create a scope. I called this scope DHCP.
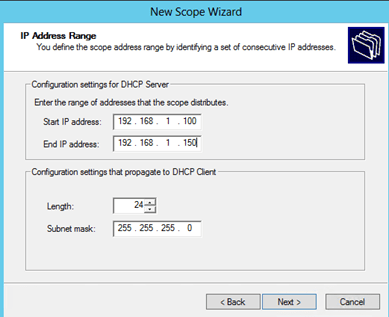
Provide an IP range for the DHCP, you should put the IP range and subnet that your environment use here.
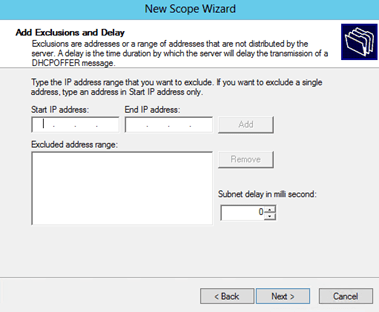
You can exclude IP address(es) from this scope to reserve the IP assigned to devices. I left this blank.
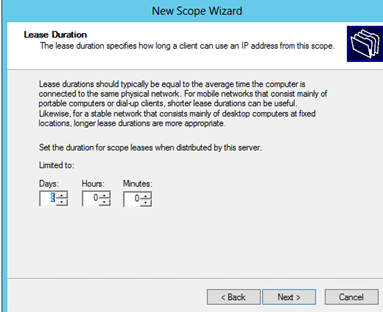
Put in a lease duration.
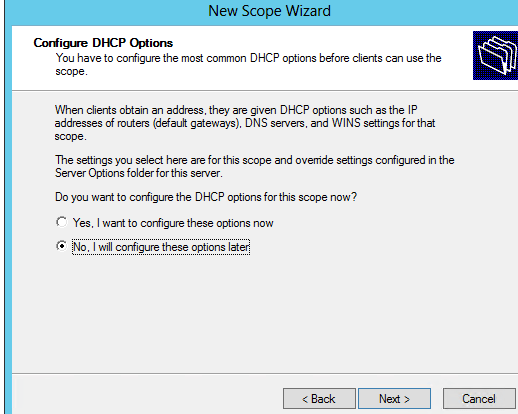
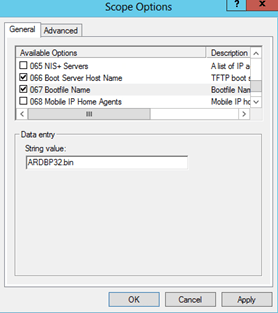
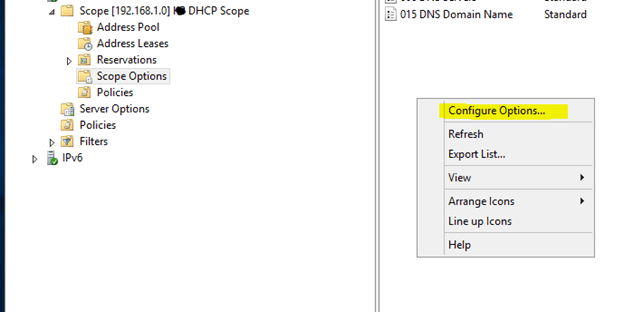
I will be using mostly the PVS PXE service method in this guide, so I am all set here. But in case if you need to setup Option 66 and 67, you will need to go to “Scope options”, right click to configure Options.
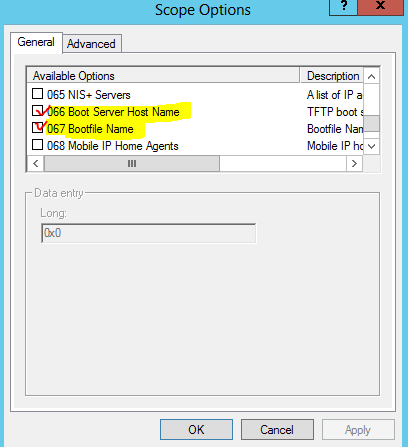
Put in the Boot Server in Option 66
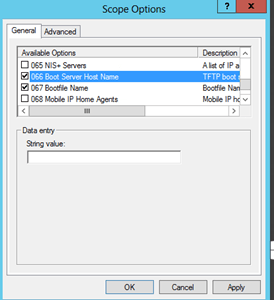
And put the boot file in option 67.