
Another good reason to use PVS for machine creation is that we can update the vDisk without any interruption of service. Once the update is finished and applied, the next time the VM boots, it will use the new version of the vDisk.
To begin the update process, we will first need to create a new VM, get its MAC address so we can add it to the list of the vDisk for access.
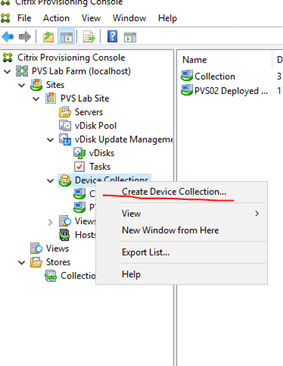
In PVS console, right click on our Device Collections and create a new Collection. This is so that we can isolate our updater collection from the Production collection.

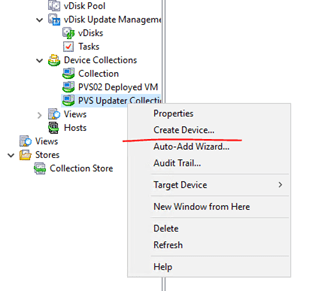
Right click on the new Collection and choose Create Device to create a new device and assign that MAC address of our new VM to it.

Give it a name, select “Maintenance” in Type, so that this VM will boot the vDisk in Maintenance mode. Put in the MAC address to associate the VM to this device.
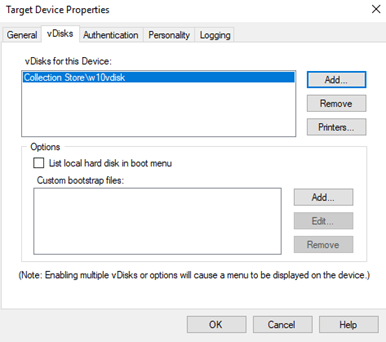
Under the vDisks tab, add our w10vDisk to this device.
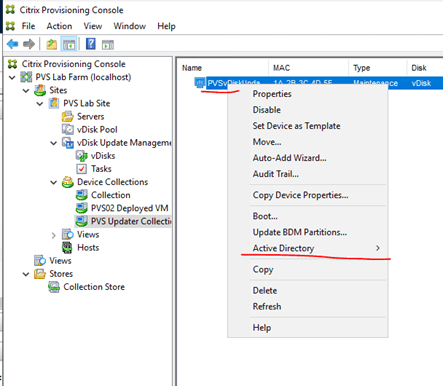
Remember to create a Computer account in our active directory. Right click on the new device -> Active Directory to create a machine account.
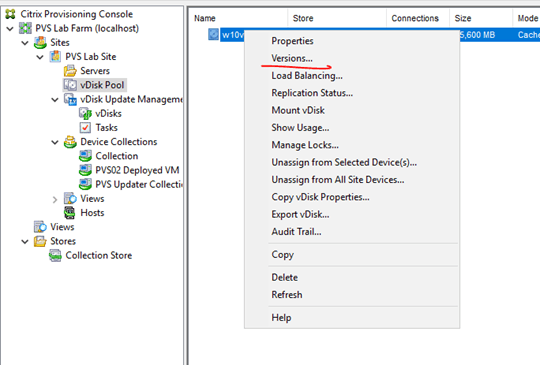
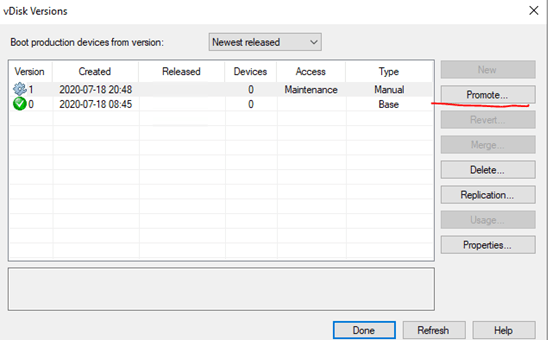
Go back to our vDisk and right click on the vDisk to select “versions”.
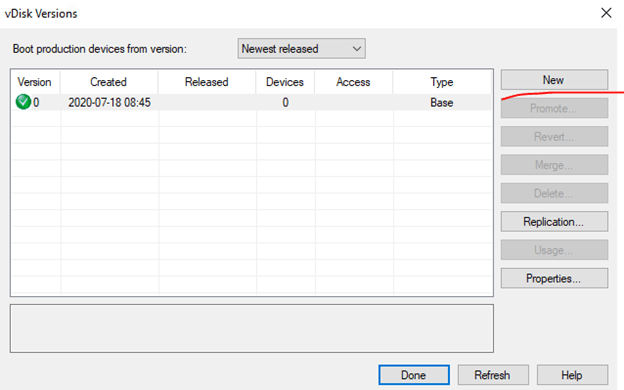
Hit “New” to create a snapshot of our vDisk, so we can start working on the updates.
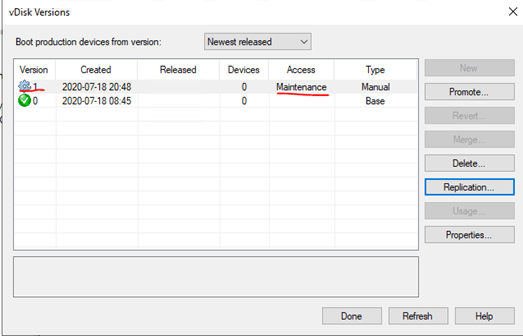
We now have a version 1 of this vDisk and it is in Maintenance mode. Version 0 is our Base version as shown above. If we go to Properties, we can type in some notes for this version to indicate what has been done during this version.
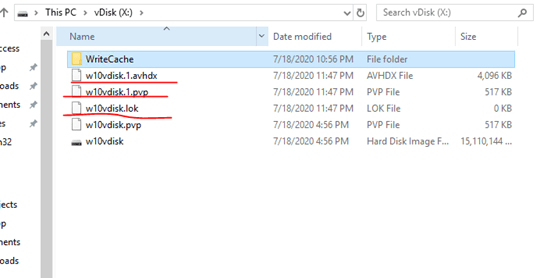
If we go to our vDisk folder now, we will see some new files created. The avhdx is the snapshot of the vDisk.
When we are done updating our vDisk, come back to vDisk Versions and select Promote to promote this version.
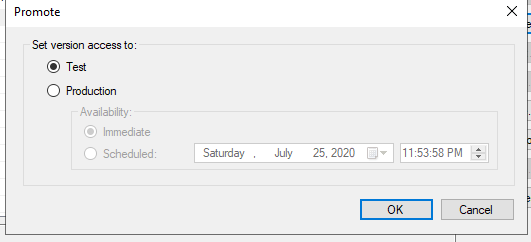
We can either promote it to a Test version to have a group of users testing it before promoting it to use in our Production environment. In this case, we will assume that it has been tested and promote it to Production. We can also schedule the update to take place at a later time. If we select immediately, the next time the VMs boot, they will use Version 1 of this vDisk instead of version 0.
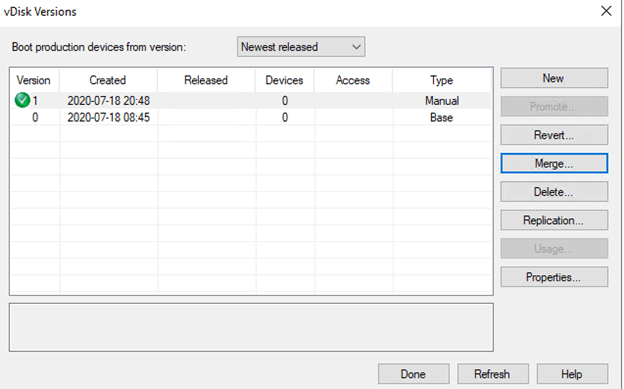
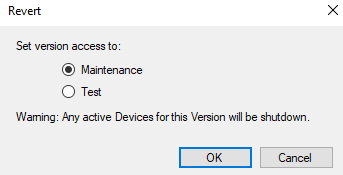
Version 1 is no longer in Maintenance mode and now we have the option to “merge” the version. This is only to be done when we are sure that there is no need to roll back to version 0. We also have the “Revert” option to revert back the changes and use Version 0 again.
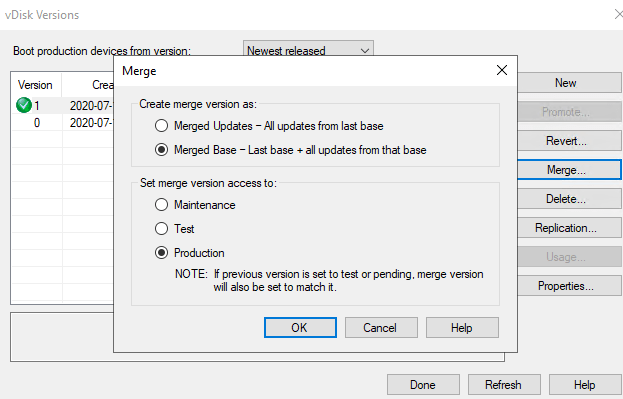
When we are ready to merge the versions, we will select Merged Base. (Merged Updates will merge all the different snapshot into 1 (all the avhdx files), keeping only the most recent snapshot. Merged Base will merge all snapshots and the base into one vDisk (leaving only the vhdx file).


There is now a Version 2 and it is merging the base and version 1 together. It will take some time for it to complete.

When the merge is finished, the VMs will now boot with version 2 of this vDisk.
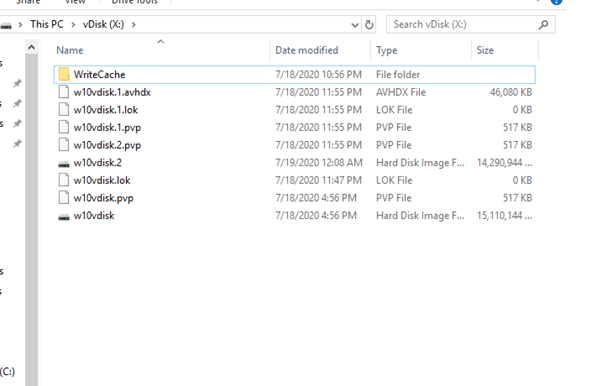
If we look at our vDisk folder, we now see a w10vdisk.2 file created. This is our version 2 of this vDisk.
We can clean up the version and the files a little bit to free up some space.

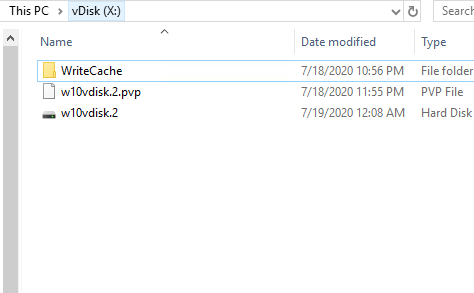
Deleting the version will delete also the vDisks stored in our vDiskfolder.
