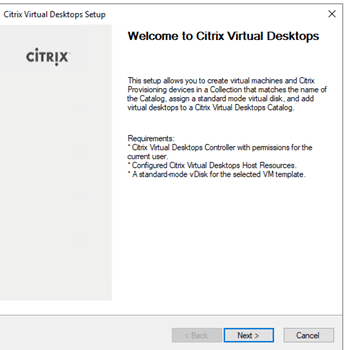
Before we can deploy VM using PVS Citrix Virtual Desktops Setup Wizard, we would need to add a hypervisor host to the site in Citrix Studio.
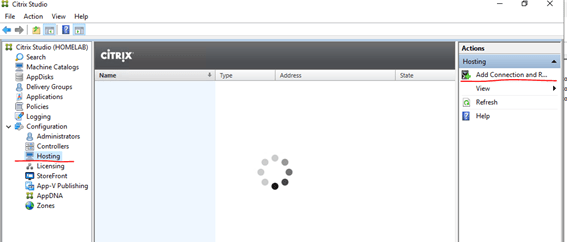
Go to Configuration -> Hosting. You can either right click on Hosting or click on the “Add Connection and Resources” option under “actions” in the right pane.
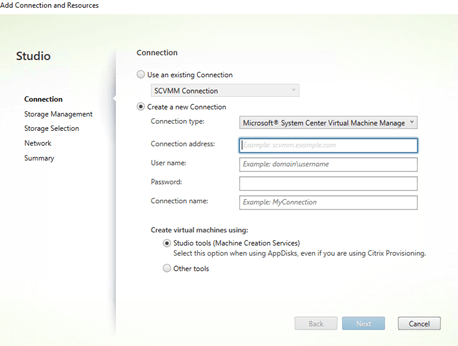
Select SCVMM as your connection Type (That is if you are using SCVMM), your VMM01 as Connection Address, and an account that can connect and access VMM01. Give it a name to identify this connection. I called mine “SCVMM connection”. We will be creating VM using Studio tools. For this to work, you will need to install VMM console on your PVS01 and your DDC01 to communicate with SCVMM.
*if you have your Firewall turned on, you will need to allow some ports in order for it to work. See Citrix Documentation to see which ports you have to allow here.

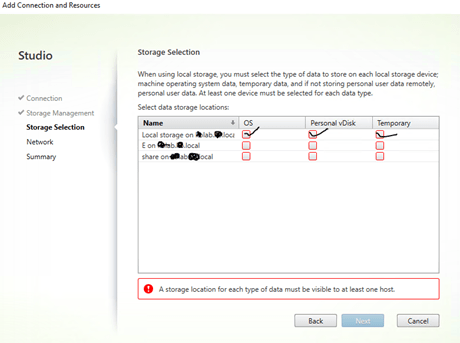
Browse to your hypervisor, it does not need to be a cluster as it suggests. Select the storage that you are going to use here. PVS will fail to create the VM if the there is any issue with locating or accessing the storage.

Give the resources a name and select the network(s) for the VM to use. I only have one network (VM Switch) defined in my environment.
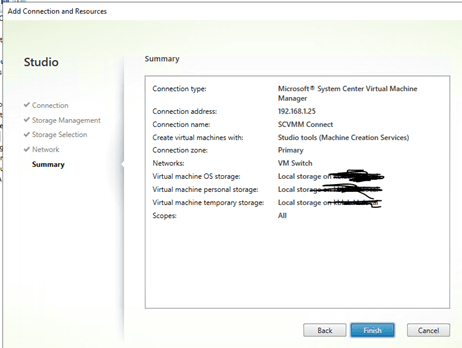
Review the information and hit Finish to establish the connection to your Hypervisor.

Now that we have our Citrix Farm connected to our Hypervisor, go back to the PVS Console and right click on Citrix Virtual Desktops Setup Wizard.
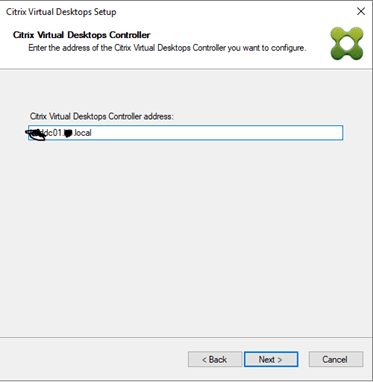
Enter your Delivery Controller here.
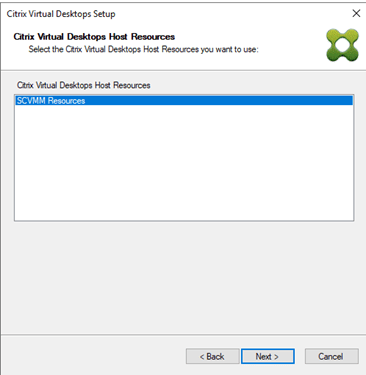
Select the Resources that we have just created over in Citrix Studio.

Remember to use an account that can access the resources.
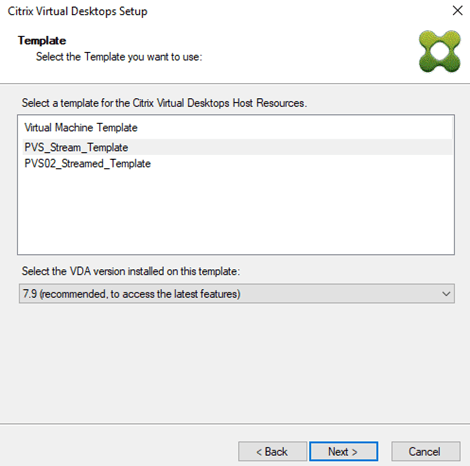
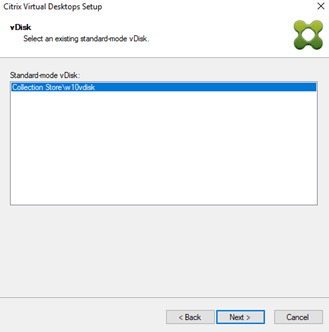
Select the template to use. If you wish, you can create another template for Citrix Virtual Desktops Setup Wizard to use. You can detach the 6 GB disk from the template, because Citrix Virtual Desktops Setup Wizard can create that disk from the wizard.
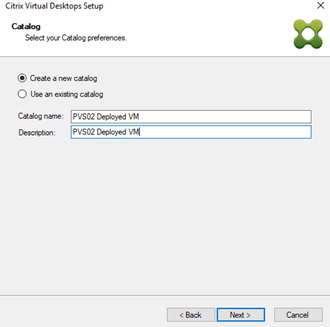
One good thing about using Citrix Virtual Desktops setup wizard is that it allows you to create new machine Catalog from the wizard so you don’t have to do it manually. Name you catalog and click next.
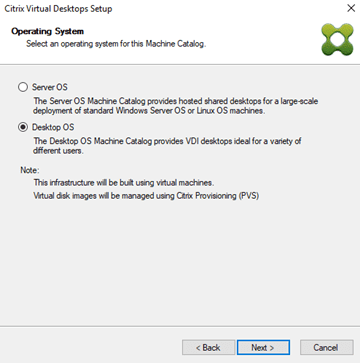
We will be deploying Desktop OS. Select and click next.
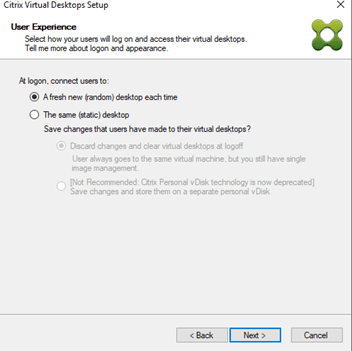
We can create Random Desktops, Static Desktops that discard all changes each time the VM boot up, or a dedicated VM that preserve all changes.
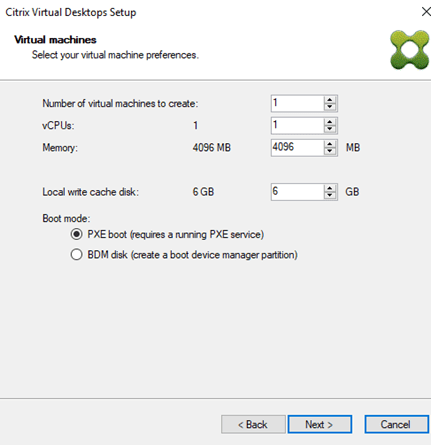
You can create as many VM as you like, assigning resources and the Local write Cache disk directly from this wizard. You also see the “Local Write Cache Disk that it is going to create along with the VMs. You can change the size of this disk here if you wish.
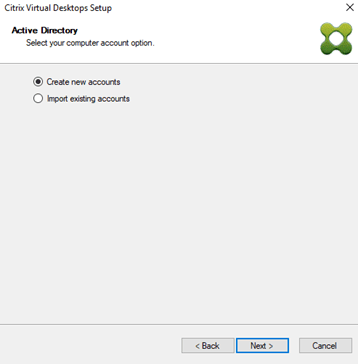

Select the OU to create the computer accounts and a naming scheme for these VM. I will call mine PVS2Deployed###.

Click finish to begin the machine creation.
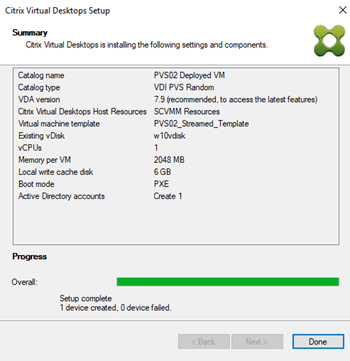
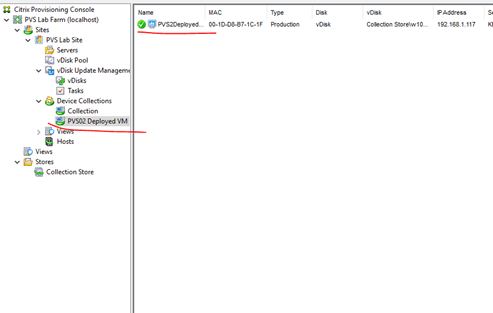
If you go back to our PVS console, you will see a new collection created and the PVS2Deployed001 VM resides here.
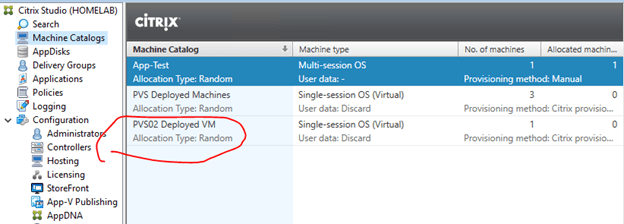
Go to your Citrix Studio and you will find the newly created Machine Catalog there. What is left to do now is to create a Delivery Group to publish these VM to our users!
