
Background story (that you can safely ignore)
One of my side gigs is at a 501(c)(3) Non-profit organization. It is never easy for Non-profit and we are always trying to save a few bucks here and there. We have been using Quickbooks online to deal with our accounting needs, but that is costing more than $1,000 a year. In searching for a cheaper solution, here is a guide created for this purpose and probably could save us that $1,000 each year. But you can use this guide to setup RDWeb for your home lab or any company.
If you are willing to sacrifice speed and performance, this setup can be free for the first year and then less than $50 the years follow. (As long as AWS does not increase their prices) (To keep it free, you will probably need to shut down the servers during off business hours to keep the usage within the 750 hours /month limit) On the other hand, if you have the 501(c)(3) status, you can join Techsoup.org and get products/services at a discounted price. Upgrading to Techsoup Boost (for the price of $79 / year) will get you Quickbooks Premier 2019 for free, as well as a bigger discount on AWS credits. You can get $2,000 AWS credit for just $80. Techsoup Boost sent me a $25 promo code to use for my first purchase, making it $79 + $80 – $25 = $134 for this whole setup, and I can use the $2,000 credits to size up my instances on AWS.
I am setting up RDWeb to launch Quickbooks to make it easier for our accountant to access the desktop version. For RDweb, we will also need to purchase 1 RDS CAL license if we end up going with this approach. Another option is to have them RDP to the AWS instance directly. If that’s the case, you can just get a AWS workspace instance and install Quickbooks Desktop version there. If you do not mind the RDP approach, it will give you a bigger saving / better performance if you just use a single instance of AWS workspace.
Requirements:
- AWS account. You can register for a free tier, and apply the $2,000 AWS credit. (if you are a nonprofit)
- 3 windows EC2 instances. I built my environment with the free tier (t2.micro with 30 GB of storage). I will probably resize the Session host for better performance.
- A 3rd party SSL Certificate (I did not get this)
- RDS CAL Licenses
The are only three steps to provide access to our RDWeb to the external world.
- Make sure TCP port 443 and UDP 3391 are forwarded to the Remote Gateway. In my lab, it would be the TESTRD01 server.
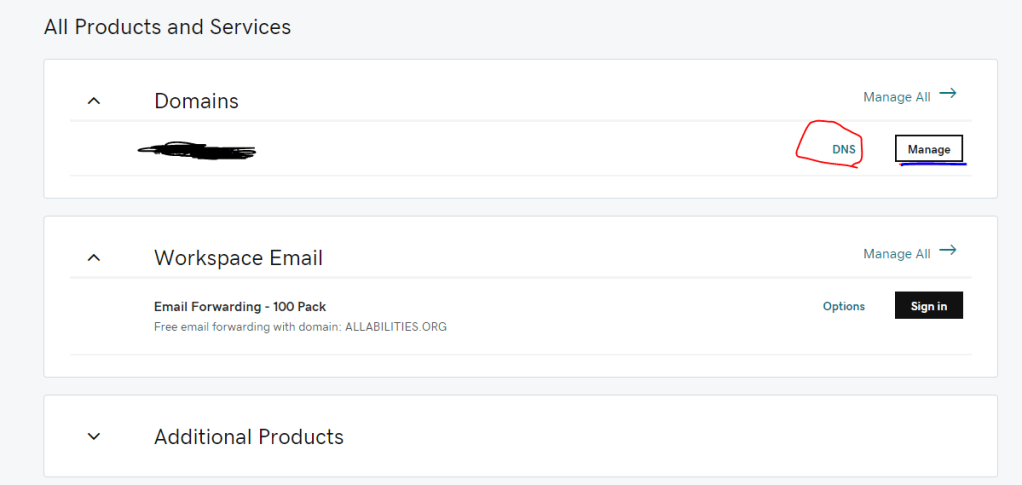
2. You need to get that traffic going to remote.rdtest.com forward to the public IP of TESTRD01. In my production environment, my domain name is from Godaddy. We need to add an A record in the DNS section of Godaddy. Login to your Godaddy account and go to your product page. You should see a “DNS” section next to your domain name.
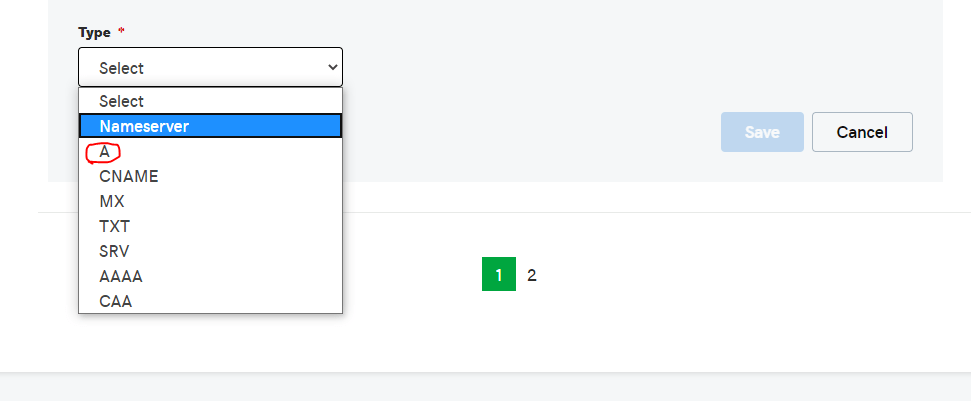
Once there, you want to scroll down and add an A record
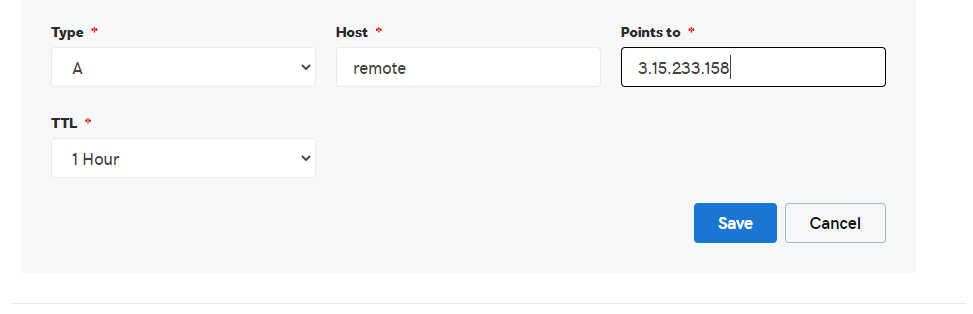
and put “remote” as the Host. This is to add a “Subdomain” to your domain. Any traffic going to remote.domain.com will be directed to the IP that we are going to put in the next “Points to” Box. (By the way, this is not a real public IP address – at least not mine!)
If your domain is with another company, there will be something similar, but that is for you to find out where to put this configuration.
If you do not own a domain, there is still a way to get this to work. We will need to manually create this redirection in the client machine. There is a “host” file in each computer running windows. You should make a backup first before making any changes to that file, just in case if you mess up and do not know how to rollback the changes.
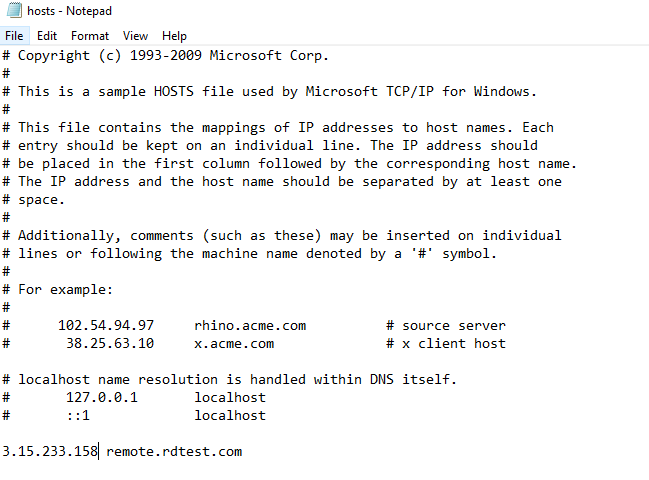
After backing up the host file, (by the way, it is located at C:\windows\system32\Drivers\etc) run notepad as an administrator by right clicking notepad and select “Run as Adminitrator”

File -> open and go to C:\windows\system32\Drivers\etc and get that host file opened. Put in the public IP address here, followed by a space, and then the name of the site. This will tell the client machine that whenever the user type in remote.rdtest.com, it should redirect the request to 3.15.233.158 instead. Once you have that in place click on File -> save, or [Ctrl] + S.
Without this DNS change, you are still able to access the RDWeb page, however, the Webpage will not know where the gateway is and you will most likely get an error message saying that the remote gateway is temporary unavailable.
3. The last thing we need to provide is that SSL certificate to the client so they can install it in the Trusted root Certification Authorities of their computer. If you still remember, we have that certificate saved in C:\cert folder of TESTRD01. (In a real world environment, you may want to keep it off the server itself. We should also have a trusted SSL in place that does not require step 3 at all.) Once the client machine has a copy of the SSL, double click on the certificate. It will open up the Certificate Snap-in.
If this client machine is shared by multiple users and all of the users will be accessing RDWeb, you will have to select Local Machine. Otherwise, current User will also work if this user is the only one using the computer.
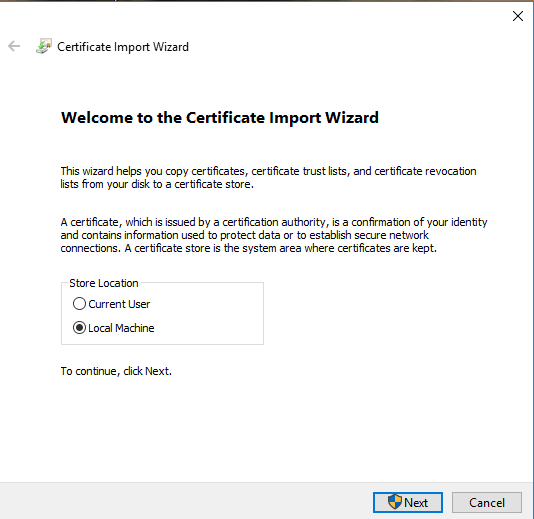
Click Next.

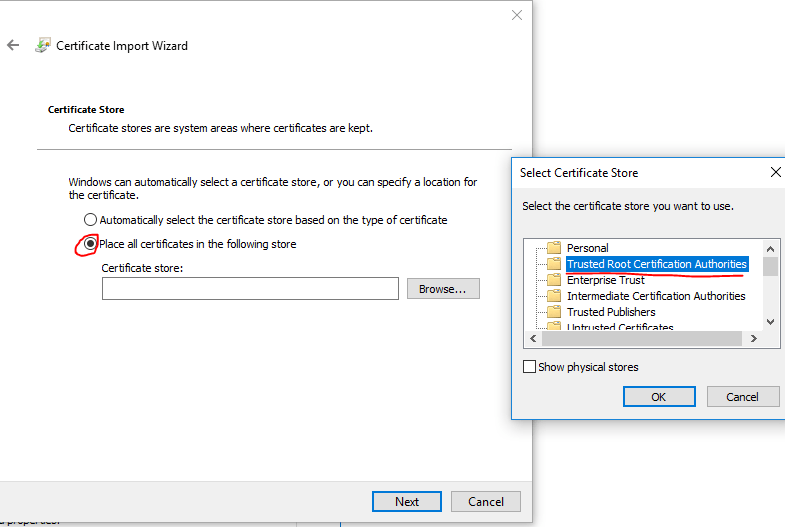
Type in the password for the SSL and click next again.

Select “Place all certificates in the following store” and browse to “Trusted Root Certification Authorities” and click next.
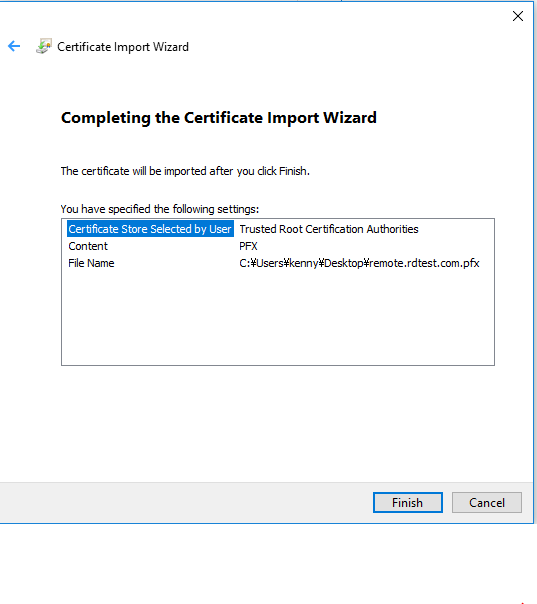
Once you click finish on the next screen, we are done with installing the SSL on the client machine.
At this point, you can open your preferred browser and type in https://remote.rdtest.com . Since we have setup HTTP redirection to redirect all HTTP request to /RDWeb, you should reach the RemoteApp login page. We can then go ahead and launch an application from there.
You now have all the steps to configure a single session host RDWeb deployment. In the future, I may come back and post documentations in adding High Availability to the environment.
In Part 4 of this guide, we will work on deploying RDWeb with only PowerShell and it will save us a lot of time. (As mentioned in Part 1 of this guide, there is one step that we need to do it from the GUI)
Until then!
